Showing posts with label materials. Show all posts

Sunday, November 13, 2016

Preparing Stinging Nettle Fibre.


Now  Stinging nettles  are one of my favourite plants that are utilized in many ways here.  Most importantly its one of the biodynamic compost plants along with its use in the chooks mash. I also use it like spinach, herb tea, green pasta to mention a few. 


Stinging nettles (Urtica dioica)is a herbaceous perennial growing to 1.5mt, with coarsely toothed leaves. They can be cut several times in a growing season. They can become invasive and should not be planted near paths. 

 So back to its use as a fibre .I decide to prepare some to make string, after researching  the method I modified it a bit and this is what I came up with.
1.     Choose the tallest nettles, ours grow to about 1.5 mt but the ones I used where a little under 1 mt. Cut nettles off at the base (best to wear gloves)


2.     Starting from the bottom run your hand to the top removing the leaves. (use these to make some liquid fertilizer)  Run it up the stem a couple more times to remove the hairs.(the bits that sting)


3.     Each stem is hollow in the centre like a tube, except at the nodes where the leaves grow. The part you want is the outside ‘bark’ so now put the stems through your pasta rollers. You can adjust the width to suit the stems. Put them through once then tighten the rollers and put them through again. (you can do several at once)
4.     The tube-like structure of the stem is now flattened and on the inside of the Nettle the harder woody material and the outside of the nettle have separated it is now easy to separate off the soft bark and woody material.


 5.     The soft material then can be  separated into 3 or 4 strand and hung up to dry

6.     To use for string, lightly damp and twist away.   

Friday, August 1, 2014

Winter Workshops

Weaving magic classroom string


Despite the cold weather winter is ideal for garden basketry workshops. There is plenty of useful materials and apart from building outdoor structures you can use your creativity indoors.

Weaving Magic series of 3 workshops over consecutive Sundays saw the participants acquire a variety of new skills. Starting with string or 2ply.After a short while many lengths of string was produced.

Next challenge was tension trays 

  Ines basketmaxine's traytension trays underway


Then outdoors  for fence and some random weaving.

fence making how's the fence looking?  finished fence

end of day 2 random weave items and tension trays plus the supervisors 

Next challenge was a rib basket 

Maxine at workP7271449Robyn and Linda Linda, Merilyn and Louise

At times it was very quite as they all concentrated. Despite my advice of making a SMALL rib basket only one student completed her basket as the rest managed larger baskets and hopefully they will compete them soon and send me the photos.

All  in all the workshops where a successful foray into sharing my skills.

Friday, June 27, 2014

Garden Basketry on ABC TV

Winter is a great time of the year to add a bit of creative basketry to your garden. On Saturday July 5th at 6.30pm there will be a segment on Gardening Australia relating to garden basketry featuring  Nirvana Farm and some of Deb’s creations.

Willow tension tray birdbarth 

simple random weave fence

Materials, Tension trays,fences and more……..and for those in the Adelaide Hills check out the Winter edition of the Adelaide Hills Magazine for more basketry stories.

Thursday, November 14, 2013

A Creative Space.

OLYMPUS DIGITAL CAMERA

Within our front garden you will find my basketry shed, better known as the ‘Witch’s Lair’ a wonderful space where I can enjoy creating, with all my materials at hand.

The shed itself was recycled , ‘buyer to remove’ A lucky buy,as it was a hexagon shed with double glass sliding door and 2 windows. Before rebuilding we carefully sited it in the garden so it faced north to take advantage of winter sun and summer shade. 

Once it was rebuilt with insulation and lined a cosy space emerged, fitted out with bartered shelving  and cupboards  through freecycle. Add our old lounge recovered to take advantage of the view.With a utility interior set up it was so much easier to create baskets and get some sewing done, the  next challenge was to complete the garden.


front entrance         from the car park         Front entrance.


Witch's lair Bird watching from the lair
Workspace and relaxing spacethe workspacew    View from the lounge to orchardview from the lounge
Woolly yarrow ground cover and western wall,with pavers I made.groundcover         Beginning of eastern wall, made from recycled cold room panels.begining of garden wall        Rendered eastern wall completed.It was fun to render and decorate.dividing wall
Detail on western cold room panel wall.
western wall
Upper garden outdoor workspace.garden workspace No witch’s Lair would be complete without a broom parking area.parking station

Saturday, November 9, 2013

Basketry Materials from the Garden

Suitable basketry material from the garden will vary depending on the project however any material that is flexible and can be bent may be suitable.

Test out plants flexibility twist and wrap leaves around your finger. If it’s flexible when fresh then it may be pliable when dried .Bend vines and poles to see if they bend the amount required. Try plants at different seasons to test flexibility and what they look like.

Some materials are better used fresh and others better when dried and dampened. Some techniques are better with fresh others with dried. Fresh materials will shrink as they dry leaving a loose weave.

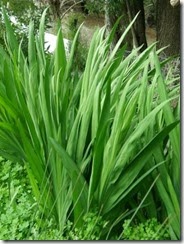
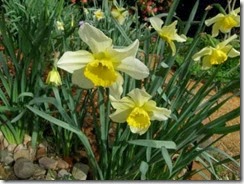
Some commonly used plants for weavers are most leaves from bulb plants e.g. iris, watsonia, daffodils, Aunt Eliza. , red hot pokers, arum lily, NZ flax, Cordyline, hops. Climbers such as passionfruit, Honeysuckle & jasmine, Kangaroo paw, banana stems, bulrush.

Frames and stakes can be made from grapevine, wisteria, willow, fruit tree pruning's, bush sticks and branches, bamboo.

Most materials need to be dried, wet and then wrapped in a towel overnight to condition. The amount of wetting varies with materials from a few seconds for arum lilies to a couple of days for grapevine or Willow.

To ensure a supply of suitable materials they need to be collected, dried and stored.

TO COLLECT MATERIALS:

  • OLYMPUS DIGITAL CAMERA         Cut or pull the leaves from the base of each plant. Keep the bases of the leaves together in bundles,
  • Discard any damaged. Dirty or mouldy leaves. OLYMPUS DIGITAL CAMERA
  • They can be spread out on a clean, dry surface in a shady area with plenty of air movement... Turn the heap of leaves frequently to allow them to dry evenly. When dry tie in bundles or secure with rubber bands.
  • Or you can hang them in a dry shed preferably well ventilated and dark. 

STORING
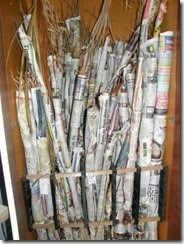
  • OLYMPUS DIGITAL CAMERA         Each bundle should be protected from dust, and moisture. This can be done by wrapping in newspaper securing with tape and labled .
  • Small leaves like corn leaves and philodendron leaf bracts can be stored in cardboard boxes. OLYMPUS DIGITAL CAMERA
  • Store in a dry place.A cupboard is ideal.

CHECK your material regularly to make sure that they are still in good condition. Discard damaged leaves.


For more information on suitable material an excellent reference book is ‘Fibre Basketry. Home-grown and Handmade’  Basketry SA


You can harvest basketry materials from your garden throughout the year

Day liliesOLYMPUS DIGITAL CAMERA         Chasmanthe OLYMPUS DIGITAL CAMERA         Lomandra
OLYMPUS DIGITAL CAMERA
Most BulbsOLYMPUS DIGITAL CAMERA         Iris Pseudacorus OLYMPUS DIGITAL CAMERA         Arum LilyOLYMPUS DIGITAL CAMERA

From October to December collect the following leaves as they start to die down:

WATSONIA

CROCOSMIA (winter gladioli)

CHASMANTHE

WINTER IRIS

KNIPHOFIA (red hot poker)

In summer you can collect:

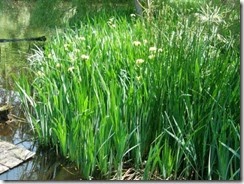
CUMBUNG/BULL RUSHES

IRIS all species

DIETES

KNIPHOFIA (red hot poker)

KANGAROO PAW leaves

LOMANDRA AND OTHER NATIVE GRASSES.

DAY LILLIES

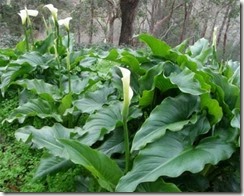
ARUM LILLIES — the very fleshy stems & leaves dry beautifully to create a silky smooth fibre


In autumn many plants die down in preparation for winter. This is the time to collect some of the

IRISES and other strappy leaves as they are faster to dry without so much danger of them going mouldy.

IRISES — select those which have not been chewed or damaged

ARISTEA — these are one of the very few plants which produce an almost black leaf

DIANELLA — coil with the shiny side in so that they don’t shrivel into a tight cylinder

VINES and CREEPERS —WISTERIA is wonderful. Coil to desired size to store.

CANNAS and GINGER — strip individual leaves, bundle and hang to dry.

DAY LILLIES which die off for winter

PINE NEEDLES — many trees drop their needles at the end of summer

Collect anytime:

SWEET CORN LEAVES — try your local greengrocer.

PHILODENDRON LEAF BRACTS — they have a rich red brown and feel like leather when dampened.

NZ FLAX — remove the centre rib from each leaf and coil them by rolling with the shiny side into the centre so that they don’t shrivel into a tight cylinder.

FINE NATIVE GRASSES, REEDS) RUSHES, CAREX.

CORDYLINE — pull dry leaves from the plant before they become tattered.

In September/October collect the JACARANDA leaf stalks as they fail.

In winter deciduous pruning’s of

TREES AND VINES,

WILLOW,

DOGWOOD

Cordyline OLYMPUS DIGITAL CAMERA         Winter IrisOLYMPUS DIGITAL CAMERA         Watsonia
OLYMPUS DIGITAL CAMERA
Spear Lily,
Red Hot Poker
OLYMPUS DIGITAL CAMERA
Deciduous pruning’s
OLYMPUS DIGITAL CAMERA
Willow
Slide20
     

Wednesday, July 6, 2011

SOME THOUGHTS ON TENSION TRAYS

coffee table

After seeing examples of tension trays brought back from the gathering in Tasmania I played around a bit with willow. The longest task was collecting the material despite the fact that I have plenty to choose from around the willow house. I made a few of various sizes taking advantage of all the lengths of willow. These have dried a nice black colour. Then I got carried away and went large and made a coffee  table. ( 1100 x 600 x 500 high )


plum tension trays


I then collected some plum suckers and found them better than the willow and they display a range of colours from brown through to red. After cutting  they were sorted into sizes and bundled each bundled size made a couple of different sized trays .e.g. 100x 150 ,300x 150.                       

This is extremely beneficial for teaching as students all have individual size preferences and it also takes maximum advantage of collected materials. I plan to use bush sticks next to see what happens.

The next thought was to add a bit of individualization so I wove some iris along the edges – left a handle and wrapped it and it became a serving tray. Plum tension tray with handle 450 x 250 + handle 100                              3-


At our last Hills  Basket Cases meeting several members made tension trays and by the end of the day they had all decided weaving along the edge was the way to go.